本帖最后由 Test 于 2012-3-5 09:49 编辑
Device Configuration Guides
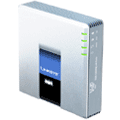
Linksys SPA3102 - VoIP to PSTN Setup

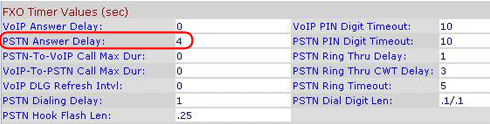
The SPA3102 supports one RJ-11 POTS (Plain Old Telephone Service) FXS port to connect an existing analog phone and 2 100BaseT RJ-45 Ethernet interfaces to connect to a home or office LAN, as well as an Ethernet connection to a broadband modem or router.
The SPA3102 FXS and FXO lines can be independently configured via software controlled by the service provider or the end user so that any Inphonex user can call their virtual number and place a call on the local POTS line.
STEP 1
Connect one Ethernet cable from your SPA3102’s ETHERNET port to the Ethernet port on your computer.
*PLEASE NOTE* Do not connect any other cables to the SPA3102 during initial configuration. (Cable/DSL/Router or Analog phone cables) If you connect anything other than this one cable, you will not be able to log into the device.
Now we must determine the address for your device so that it can be accessed and configured with you browser. To do this, we will need to find out what gateway address the device has given your computer.
To find the current gateway:
WINDOWS XP
- Click Start
- Click Run
- Type CMD and press <enter>
- Type IPCONFIG and press <enter>
In the returned list of information please find the section labeled LOCAL AREA CONNECTION and write down the default gateway.
EXAMPLE
Ethernet Adapter Local Area Connection:
|
| | Connection-specific DNS Suffix | | | IP Address | 192.168.0.2 | | Subnet Mask | 255.255.255.0 | | Default Gateway | 192.168.0.1 |
STEP 2
Open up the web browser on the computer that is connected to the device and enter in the gateway address given to you.
EXAMPLE
<IPADDRESS>
(where <IP ADDRESS> is replaced by the address that was given to you in STEP 1).
|
STEP 3
Click on “VOICE” Tab.

Click on “ADVANCED”.

STEP 4
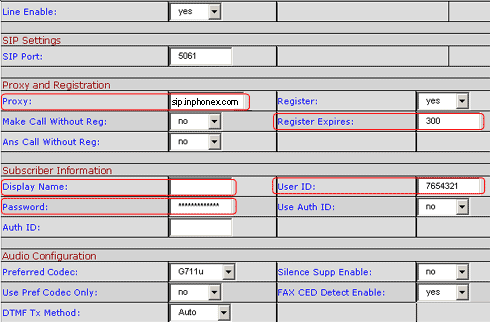
Click on “PSTN Line” Tab.

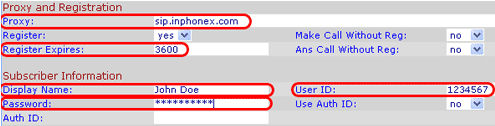
| Modify only the circled items of the following:
| Proxy:
| sip.inphonex.com
| Register Expires: | 300 | Display Name: | Enter your full name. | Userid: | Enter the new virtual phone number that you just added to your account, as mentioned in the note above. | Password: | Enter the password that you chose when you signed up for InPhonex service. |
 |
STEP 5
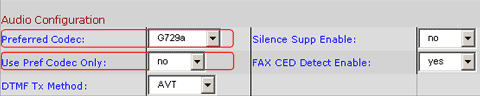
Change the “Preferred Codec” to G729a. Also be sure that the “Use Pref Codec Only” option is set to NO.
|
STEP 6
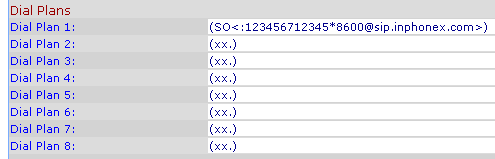
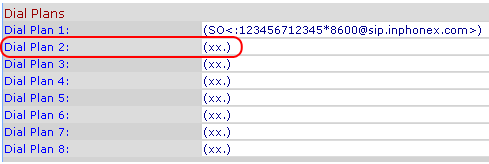
Verify that Dial Plan 2 is configured as follows:
(xx.)
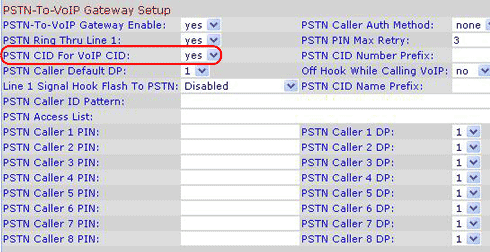
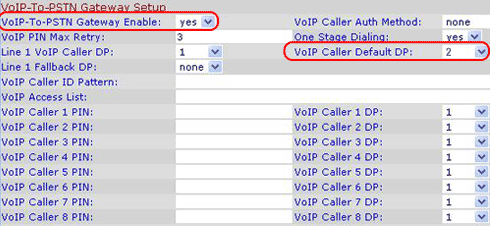
Step 7 Change the "VOIP-To-PSTN Gateway Enable" setting to YES.
Change the "VoIP Caller Default DP" to 2.
PLEASE NOTE: When calling into the device from VoIP, you will not hear a dial tone when the PSTN line is ready. Your VoIP phone will show that your call is connected. At that time, dial the number of your choice just as you normally would from your POTS/PSTN phone.
| 

 窥视卡
窥视卡 雷达卡
雷达卡 发表于 2012-3-5 09:11:20


 提升卡
提升卡 置顶卡
置顶卡 沉默卡
沉默卡 喧嚣卡
喧嚣卡 变色卡
变色卡 抢沙发
抢沙发 千斤顶
千斤顶 显身卡
显身卡