|
|
楼主 |
发表于 2013-5-27 13:50:22
|
显示全部楼层
Preseed File Configuration
I come from a RHEL/CentOS background so it took me a few days to get the preseed working flawless without any user intervention. Below is an example preseed you should be able to leverage to create your own for your environment. In /export/preseed you will want to create a file yourhost.cfg with below content.
The first part of the preseed sets up basic information such as language, keymap, etc..- d-i debian-installer/locale string en_US
- d-i console-tools/archs select at
- d-i console-keymaps-at/keymap select American English
- d-i debian-installer/keymap string us
- d-i netcfg/choose_interface select eth0
- d-i netcfg/dhcp_timeout string 300
- d-i netcfg/get_hostname string your_host_name
- d-i netcfg/get_hostname seen true
- d-i netcfg/get_domain string example.com
- d-i netcfg/get_domain seen true
- d-i netcfg/disable_dhcp boolean true
- d-i netcfg/dhcp_failed note
- d-i netcfg/get_nameservers string 192.168.10.12
- d-i netcfg/get_ipaddress string 192.168.10.141
- d-i netcfg/get_netmask string 255.255.255.0
- d-i netcfg/get_gateway string 192.168.10.1
- d-i netcfg/confirm_static boolean true
- d-i mirror/protocol string ftp
- d-i mirror/ftp/hostname string 192.168.10.133
- d-i mirror/ftp/directory string /10.04/
- d-i mirror/ftp/proxy string
- d-i mirror/suite string lucid
- d-i mirror/udeb/suite string lucid
- d-i mirror/udeb/components multiselect main, restricted
- d-i clock-setup/utc boolean false
- d-i time/zone string American/Denver
- d-i passwd/make-user boolean false
- d-i passwd/root-password password passw0rd
- d-i passwd/root-password-again password passw0rd
- user-setup-udeb passwd/root-login boolean true
- d-i grub-installer/only_debian boolean true
- d-i pkgsel/upgrade select none
- d-i pkgsel/update-policy select none
- d-i pkgsel/updatedb boolean true
- d-i base-installer/kernel/override-image string linux-server
- tasksel tasksel/first multiselect standard
- d-i pkgsel/include string puppet lsb-release openssh-server screen sysstat wget ldap-utils
- d-i finish-install/reboot_in_progress note
- d-i apt-setup/services-select multiselect security
- d-i apt-setup/security_host string security.ubuntu.com
- d-i apt-setup/security_path string /ubuntu
- d-i apt-setup/local0/repository string http://apt.puppetlabs.com/ubuntu lucid main
- d-i apt-setup/local0/key string http://keyserver.ubuntu.com:11371/pks/lookup?op=get&search=0x1054B7A24BD6EC30
- d-i partman-auto/disk string /dev/sda
- d-i partman-auto/method string lvm
- d-i partman-lvm/device_remove_lvm boolean true
- d-i partman-md/device_remove_md boolean true
- d-i partman-lvm/confirm boolean true
- d-i partman-lvm/confirm_nooverwrite boolean true
- d-i partman-auto-lvm/guided_size string max
- d-i partman-auto/choose_recipe select multi
- d-i partman/default_filesystem string ext4
- d-i partman-partitioning/confirm_write_new_label boolean true
- d-i partman/choose_partition select finish
- d-i partman/confirm boolean true
- d-i partman/confirm_nooverwrite boolean true
- popularity-contest popularity-contest/participate boolean false
- d-i preseed/late_command string \
- /bin/echo "192.168.10.133 puppet puppet.example.com" >> /target/etc/hosts; \
- /bin/sed -i s/true/false/g /target/etc/puppet/puppet.conf; \
- /bin/sed -i s/no/yes/g /target/etc/default/puppet
- d-i preseed/early_command string /bin/killall.sh; /bin/netcfg
Setting Up Apache To Serve Ubuntu Installation Files
Now we need to make sure Apache is configured to serve up the distribution we have mounted in /export/ubuntu/10.04. The first thing we need to do is make sure apache2 is installed.- sudo apt-get install apache2
- alias /ubuntu "/export/ubuntu"
- <Directory "/export/ubuntu">
- Options Indexes MultiViews FollowSymLinks
- AllowOverride None
- order deny,allow
- Allow from all
- </Directory>
Now we want to setup access to the preseed configuration files in /export/pressed so we will add the following lines to the /etc/apache2/sites-enabled/000-default file:- alias /kickstart "/export/kickstart"
- <Directory "/export/kickstart">
- Options Indexes MultiViews FollowSymLinks
- AllowOverride None
- order deny,allow
- Allow from all
- </Directory>
- sudo /etc/init.d/apache2 restart
As stated in the preseed configuration section I had problems getting http to work, I read many blogs where other people had the same problem so I simply configured my system to have vsftpd installed and configured to serve up the debian packages for the installer. First we want to install vsftpd:- sudo apt-get install vsftpd
- listen=YES
- anonymous_enable=YES
- local_enable=NO
- dirmessage_enable=YES
- use_localtime=YES
- xferlog_enable=YES
- connect_from_port_20=YES
- secure_chroot_dir=/var/run/vsftpd/empty
- pam_service_name=vsftpd
- rsa_cert_file=/etc/ssl/private/vsftpd.pem
- sudo usermod -d /export/ubuntu ftp
- sudo /etc/init.d/vsftpd restart
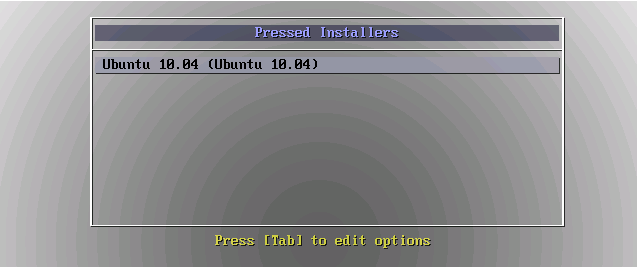
Selecting The Preseed File
Once we boot our new system or virtual machine we should be presented with the following Preseed Menu:

From this image we want to press the key and type in the name of our config in my case its example.cfg:

Press enter and your installation should begin.
|
|

 窥视卡
窥视卡 雷达卡
雷达卡 发表于 2013-5-27 13:29:40
 提升卡
提升卡 置顶卡
置顶卡 沉默卡
沉默卡 喧嚣卡
喧嚣卡 变色卡
变色卡 抢沙发
抢沙发 千斤顶
千斤顶 显身卡
显身卡