Windows 7 and Media Center
Manufacturer:
ASRock
Product:
Windows 7
For most enthusiasts installing Windows 7 is a breeze, a far cry from
the cumbersome install of Windows 95/98/ME/2000. Windows Vista and 7
are extremely simple to setup, requiring almost no input from the user,
even someone who knows very little about computers can run through the
setup with an easy to follow guide.
Today we’re going to run through the basics of setting up Windows 7
Ultimate for use in a HTPC (Home Theater Personal Computer). We’ll cover
the initial set up, configuration of Windows Media Center, setting up
Media Browser for DVD/Blu-ray/HD-DVD playback, and talk about the Sleep
modes. We are not going to get into the different codecs needed for
.mkv’s and other transocded files as that is beyond the scope of this
article. Our focus is for a novice who is interested in a HTPC but lacks
the background knowledge of how to get it going.

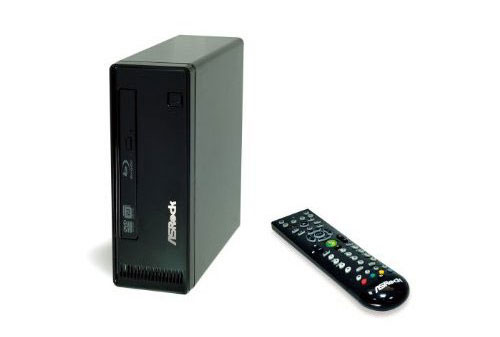
The first thing we’ll start off with is the system itself. The basis
of our HTPC article is going to be the ASRock ION 330HT. As the name
suggest, it’s an ION based platform with a dual core ATOM processor and
NVIDIA 9400M graphics chip. It has 2GB of DDR2, a Seagate 320GB notebook
hard drive, Wireless B/G/N, Gigabit LAN, HDMI, and a Blu-ray drive. It
has no expansion slots so if you were to pick up a system such as this
you’d need a USB TV tuner if you wanted to have DVR capability on this
machine.
Our install is going to be Windows 7 Ultimate in 32-bit. Remember
that Home Premium, Professional, or Ultimate are the editions that have
Windows Media Center. Since we are planning to play back DVD files from
the original file structure of the discs (VIDEO_TS Folders) we don’t
need any third party codecs. If you were planning to playback files such
as .mkv’s then you’d need to install a separate codec and possibly
filters to improve the picture quality, which we aren’t going to cover
here. Be aware that there have been problems using 64-bit and third
party codecs but for the most part they have been sorted. For Blu-ray
playback we recommend either PowerDVD or Total Media Theater.
Once you’ve placed your Windows 7 disc into the drive, you’re ready
to rock and roll. You’ll want to boot from the DVD and set up will
begin. Once a few files have been loaded into memory Windows will prompt
you for the language, time and currency, and keyboard input you’d like
to install.
After setting those options you get the “Install now” button
After setting those options you get the “Install now” button
And now Windows is ready to start the setup!
|